
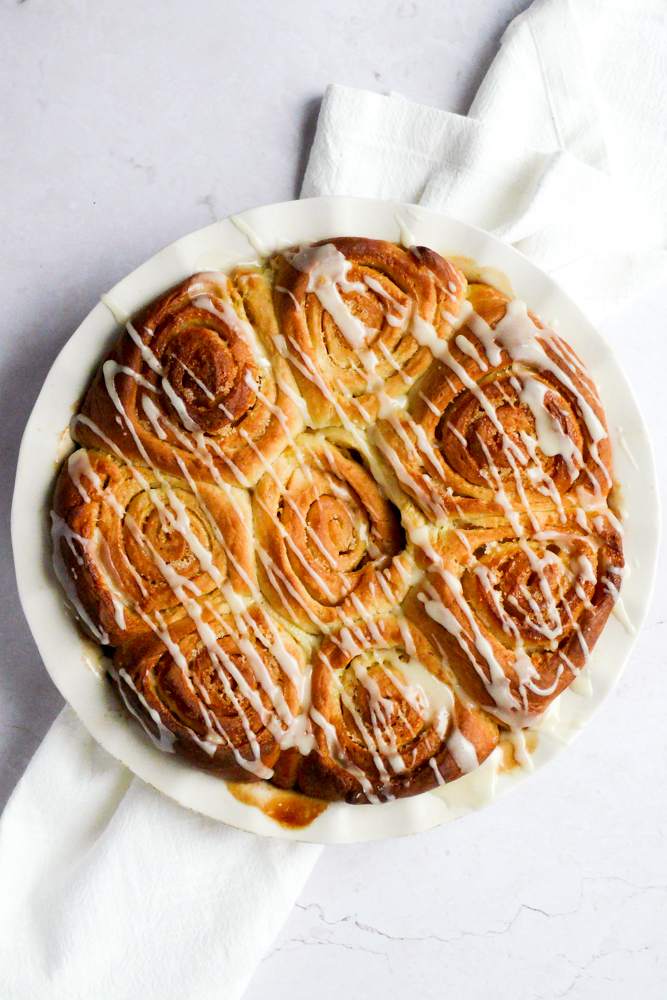
Fluffy rolls filled with a tangy sweet cara cara orange filling and topped with an orange glaze. Assembled and made the night before for an easy morning bake.
Making the Dough:
This dough comes together fairly quickly in a stand mixer. Start by heating the milk, 2 tablespoons of sugar, and orange peels together until the milk is warm (the orange peel gives the dough a slight orange flavor). Then pour part of the milk mixture over the yeast to bloom it. You will know your yeast is active if it is bubbly and the yeast has formed aerated clumps on the top of the milk.
While the yeast blooms, combine the dry ingredients in a stand mixer fitted with a dough hook. This dough can be formed by hand but will take quite a long time and may never reach the goal gluten development. Pour in the rest of milk, yeast mixture, and beaten egg into a well made in the center of the dry ingredients. Mix on low until the flour has been hydrated (just long enough to where your mixture won’t go poof if you crank up the speed). Then increase the speed to medium high and let the stand mixer knead the dough for roughly 4 minutes until no streaks of the eggs can be seen and a dough has formed.
Then add in the melted butter. The dough will split, but will eventually come back together within the 10 minutes of kneading needed for a smooth dough to form. Proof the dough.
Assemble the dough into rolls, bake, and enjoy!
Proofing Bread Tips and Tricks:
Proofing bread is a pain. It’s all about instinct and gut-feeling, and if you’re a big fans of exact stats and numbers like me, it’s probably not your friend. That being said, here are a few tips to make it more manageble.
- Take a picture. I didn’t even think of this until a few months ago, but if you can never remember how big your dough is like me, it’s a great way to have a reference on just how big “doubled” is.
- Similar to #1, use a bowl that’s about double the size of your dough. That way when the dough hits the top, you know it has doubled in size.
- Don’t be afraid to use the oven. If you can’t find a warm place to proof your dough, turn just the oven light on and pop your dough in for the proof. If your oven doesn’t have a light, turn it on to 100ºF, place the dough in, and then immediately turn off the oven and prop the door open with a spoon.
- Use a produce bag as bowl cover. These fit perfectly over the top of the bowl/pie plate and make for an easy and eco-friendly/reusable bowl cover.
- Overproofing. It’s one of the most common baking mistakes. You want your dough to be look puffy, but not like its about to collapse. If you think you’re dough is proofed and has doubled, it’s most likely ready to go.
Let’s talk Cara Cara:
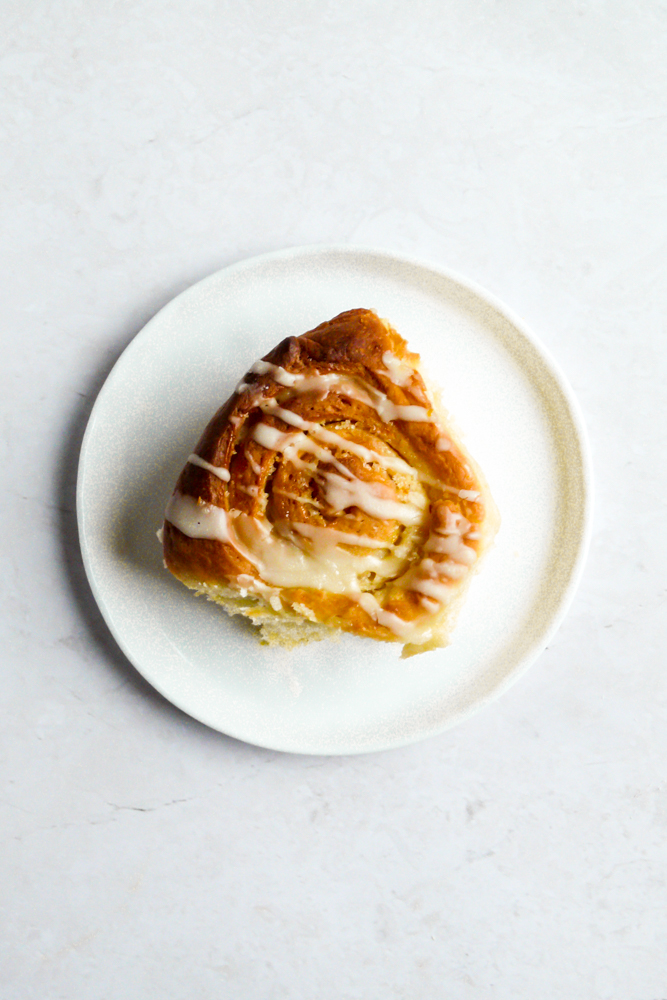
Cara Caras are oranges cooler older sister. They have a slightly reddish center and are super tangy and sweet. Think an in between of blood and normal oranges. I didn’t set on this being a cara cara orange rolls recipe, but I accidentally picked them up from the grocery store and realized they made the perfect orange filling!
Normal oranges will also work just fine and will still taste delicious, so don’t fret if cara cara aren’t available near you.

Baking and Serving:
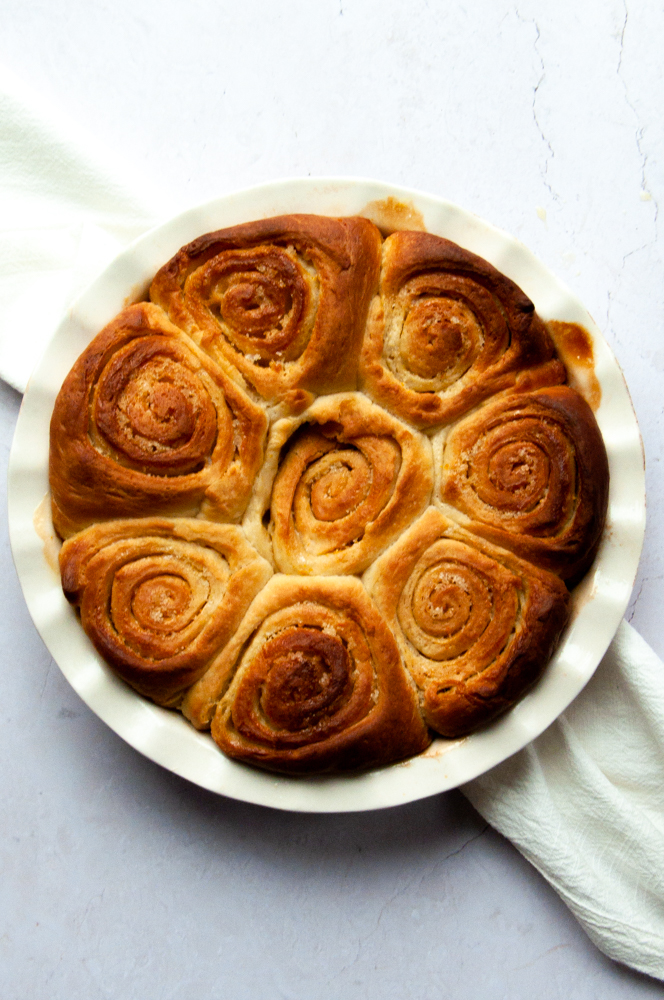
Another common mistake with enriched breads is underbaking/overbaking. The easiest way to avoid this is to take the internal temperature with a food thermometer. The goal temperature is 185ºF, but you will want to remove these from the oven at 180ºF to account for carryover cooking.
I also bake these in a pie pan as it makes for easy storage, fits the circular rolls perfectly, and looks adorable. But if you don’t have a pie pan, a cake pan will also work just fine.
These stay good in the fridge (glaze), or at room temp (no glaze) for 3 days. Be sure to cover fully in a glass or tupperware container.
Tools for these Rolls:
may contain affiliate links that add no cost to you
Don’t forget to review this recipe and tag me on Instagram if you give it a try! I love seeing all your fabulous kitchen creations.
More Orange Recipes:
https://dishingwithdelaney.com/blackberry-orange-muffins/
https://dishingwithdelaney.com/small-batch-cranberry-orange-biscotti/
Cara Cara Orange Rolls
- Prep Time: 1 hour
- Cook Time: 30 minutes
- Total Time: 16 hours
- Yield: 8 rolls 1x
- Category: breads
- Method: baking
- Cuisine: breakfast
Description
Fluffy rolls filled with a tangy sweet cara cara orange filling and topped with an orange glaze. Assembled and made the night before for an easy morning bake.
Ingredients
Dough:
1 cup whole milk
peel from 1/2 orange
6 tbsp granulated sugar (divided)
2 1/4 tsp (1 envelope) active dry yeast
3 1/2 cups (420g) all purpose flour
1 1/2 tsp baking powder
1 1/2 tsp salt
1 egg, beaten
6 tbsp unsalted butter, melted (85g)
Filling:
6 tbsp softened butter (85g)
1/3 cup granulated sugar
Zest of one cara cara orange
Glaze:
1 cup powdered sugar, sifted
2 tablespoons cara cara orange juice
Instructions
Dough:
1) In a small saucepan, heat milk, orange peels, and 2 tbsp sugar to 100ºF. Once the temperature has been reached, immediately take off heat (this mixture should be warm, not hot).
2) Remove orange peels from the milk. Combine 1/4 cup of the milk mixture with the yeast and let bloom for 5 minutes (the rest of the milk will be used later on).
3) While yeast blooms, combine flour, baking powder, salt, and remaining sugar in the bowl of a stand mixer fitted with dough hook. Mix on low just to combine all your dry ingredients.
4) Once yeast has bloomed, form a well in the middle of your bowl and add in the yeast, milk, and beaten egg. Mix on low and then increase to medium until a dough forms, roughly 4 minutes.
5) Then mix in the butter in three increments, one minute between each, while the mixer is still running. The dough will fall apart but will come back together with time. Mix for 10 minutes on medium high until a cohesive and smooth dough has formed.
6) Form dough into a ball and place in a lightly greased bowl. Cover the bowl with a damp towel and let rise in a warm place for roughly 1.5-2 hours until doubled in size and puffy.
Filling:
In a stand mixer fitted with a paddle attachment, mix 1/3 cup granulated sugar, softened butter, and orange zest together for 1-2 minutes until sugar and butter have just begun to cream together.
Assembly:
7) Once the dough has proofed, dump it onto a lightly floured surface and roll into a 15×20 inch rectangle.
8) Smear filling onto the dough leaving a 1/2 inch border. Tightly roll the dough into a from the long end up.
9) Chop off the ends (chef’s treat) and cut the dough into 8 pieces working from the center out (you can also use dental floss for super sharp cuts).
10) Place the rolls into a lightly greased pie pan, or 8 inch cake pan, and fully cover with either plastic wrap or a produce bag. Place in the fridge overnight to proof.
Note: You can also let the rolls proof for another hour and bake immediately afterwards.
11) The next morning, take the rolls out the fridge and proof for roughly 1 hour (they should be just approaching room temperature. Preheat your oven to 350ºF.
12) Bake the rolls at 350ºF for 20-25 minutes until they reach an internal temperature of 180ºF. Pour on glaze and enjoy.
Glaze:
13) While rolls bake, whisk together salt, orange juice, and powdered sugar until smooth. Adjust ratio as necessary.
Nutrition
- Serving Size: 1 roll
- Calories: 504
- Sugar: 34.2g
- Sodium: 463.9mg
- Fat: 18.5g
- Carbohydrates: 77.4g
- Protein: 8.1g
- Cholesterol: 69.7mg
Keywords: cinnamon rolls, orange, orange rolls, cara cara oranges, breakfast
[…] Bread Flour: I tested this recipe with both bread and all purpose flour, but because the shaping of these buns require dough strength, bread flour is necessary. If you only have all-purpose flour, try making these orange rolls. […]